PFMS vendor registration steps start with a check that many new data operators skip: whether the vendor already exists. A vendor can be registered on PFMS only once. If another office has already added the same supplier, the system won’t allow a second registration, and you simply map the existing vendor to your agency instead. Get that right, and the rest is straightforward: enter details, add a bank account, wait for the bank to validate it, and note the vendor’s unique code for every payment that follows.
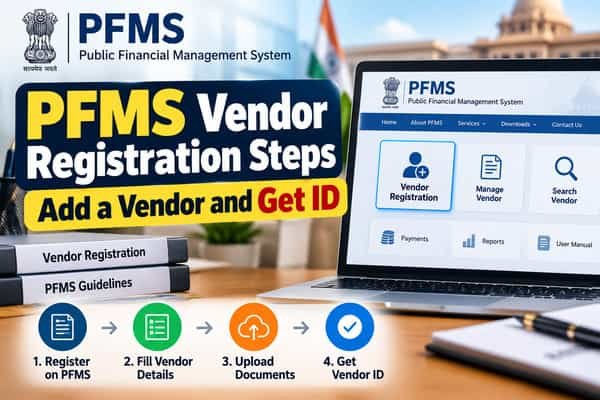
This guide covers both the agency route and the ministry route, the vendor types to choose from, and the mistakes that hold up validation.
| Particular | Details |
| Who registers vendors | The paying office: agency data operators, or programme division users in ministries |
| Can vendors self-register? | No; vendors give details to the office paying them |
| Fee | None |
| Agency menu path | Masters > Vendors > Add New |
| Ministry menu path | Master Data > Vendor/Beneficiary > Create New Vendor |
| Duplicate rule | A vendor can be registered only once on PFMS |
| Existing vendor | Search by name, unique code or bank account, then map |
| Bank check | Account validated by the bank before payments |
| Status check | Masters > Vendors > Manage, showing bank status and account status |
| Result | A vendor unique code is created |
| Vendor type | Chosen at creation; on the ministry side, it can’t be edited later |
Who Registers a Vendor
Vendors on PFMS are added by whoever is paying them:
- Implementing agencies add suppliers, contractors, service providers and even salaried staff as vendors in their agency login, usually through the data operator. Agencies typically need to register vendors before filing expenditure against them.
- Ministries and departments add vendors through programme division users when creating sanctions for direct payments.
The vendor doesn’t log in or fill a form on PFMS. There’s no fee, so agents offering paid “PFMS vendor registration” don’t add anything a supplier can’t get simply by sharing correct details with the paying office.
Before You Start: Collect These Details
Keep these ready before opening the screen, ideally with a copy for the office file:
- Vendor’s legal name, spelled exactly as in the bank’s records
- Vendor type, such as individual, commercial firm, institution or NGO
- PAN, and GSTIN where the vendor is GST-registered
- Address and contact details
- Bank name, branch, account number and IFSC
- A cancelled cheque or bank letter, to verify the account details
The name match matters most. If the vendor’s name in PFMS differs from the bank’s records, validation can be delayed or rejected.
Step 1: Search Before You Add
- Log in with your data operator ID.
- Go to Masters > Vendors > Manage.
- Search using the vendor’s name, unique code or bank account number.
- If the vendor appears as registered by another agency, select it and map it to your agency.
- If nothing turns up, move to Step 2.
Searching by bank account number is the most reliable, since names are often spelled differently.
Step 2: Add a New Vendor in the Agency Login
- Go to Masters > Vendors > Add New.
- Select the vendor type from the dropdown.
- Enter the vendor’s details: name, address, PAN, GSTIN if applicable and contact information.
- Under bank details, type the first four letters of the bank’s name and pick the correct bank from the list.
- Enter the account number and branch or IFSC details.
- Click Add Bank Details.
- Save the record.
On saving, PFMS confirms that the vendor has been created and generates a vendor unique code. Write it down or save it in your office vendor register. You’ll use it to search, map and pay this vendor from now on.
Step 3: Check Bank Validation
A new vendor can’t be paid until the bank confirms the account. To check:
- Go to Masters > Vendors > Manage.
- Find the vendor.
- Look at the Bank Status and Account Status
Once the account shows as validated and active, the vendor is ready to be paid. If validation fails, correct the details and resubmit rather than creating a new vendor.
Adding Vendors on the Ministry Side
For central ministries and departments paying vendors directly, the programme division user follows a slightly different path:
- Go to Master Data > Vendor/Beneficiary > Create New Vendor.
- Select the vendor type, fill all fields and save.
- The vendor is added to the list of Mapped Vendors.
- When creating a sanction, select the vendor in the sanction’s vendor and payee details.
To change details later, use Master Data > Vendor/Beneficiary > Manage Vendors/Beneficiaries. One thing can’t be changed: the vendor type. Choose it carefully the first time.
Choosing the Right Vendor Type
PFMS offers several vendor types, and the exact list can vary slightly by module. Commonly used types include:
| Vendor type | Typically used for |
| Individual or personal | Salaried staff, consultants and other individuals paid by the agency |
| Commercial | Suppliers, contractors and businesses |
| Institutional | Universities, hospitals and other institutions |
| NGO | Non-governmental organisations receiving payments |
| Professional | Professionals paid for services, such as auditors |
| Self | Used in some institute set-ups for payments to students or faculty |
| Others | Payees that don’t fit the above |
When unsure, follow your scheme’s guidance or ask the state PFMS team, especially on the ministry side where the type can’t be edited afterwards.
Editing a Vendor’s Details
Use the Manage option to update details like address or contact information. Changing the bank account sends it back for validation, so payments to that vendor should wait until the new account shows as validated. Keep a written request from the vendor on file for any bank change, since it protects the office if a payment later goes astray.
Why Vendor Validation Fails
- Name mismatch between PFMS and the bank’s records
- Wrong account number or IFSC, often from typing errors
- Account closed, dormant or frozen at the bank
- Wrong bank selected from the list, especially after bank mergers
- Duplicate registration attempt for a vendor already on PFMS
The fix is almost always to correct the existing record, not create a new one.
For Vendors: What to Give the Paying Office
If you’re a supplier waiting to be paid by a government office or agency:
- Share your legal name exactly as in your bank account, along with PAN and GSTIN if applicable.
- Give a cancelled cheque or bank letter so the account details can be verified.
- Ask for your PFMS vendor unique code once you’re added. It helps when tracking future payments with the office.
- Inform the office in writing if your bank account changes.
FAQs
Q1. How do I add a vendor in PFMS?
A. Log in as data operator, go to Masters > Vendors > Add New, enter the vendor’s details and bank account, and save.
Q2. Can a vendor register on PFMS by itself?
A. No, vendors are registered by the office or agency paying them.
Q3. What if the vendor is already registered on PFMS?
A. Search by name, unique code or bank account and map the existing vendor to your agency.
Q4. Where can I check vendor bank validation status?
A. Go to Masters > Vendors > Manage and check the vendor’s bank status and account status.
Q5. What is a vendor unique code in PFMS?
A. It’s the code PFMS generates when a vendor is created, used to search, map and pay that vendor.
Q6. Can I change the vendor type after registration?
A. On the ministry side, the vendor type can’t be edited, so choose it carefully when creating the vendor.
Q7. Is there a fee for PFMS vendor registration?
A. No, vendor registration on PFMS is free and handled by the paying office.
Q8. Why is my vendor’s bank validation failing?
A. Common causes include a name mismatch, wrong account number or IFSC, a closed account or the wrong bank selected.